
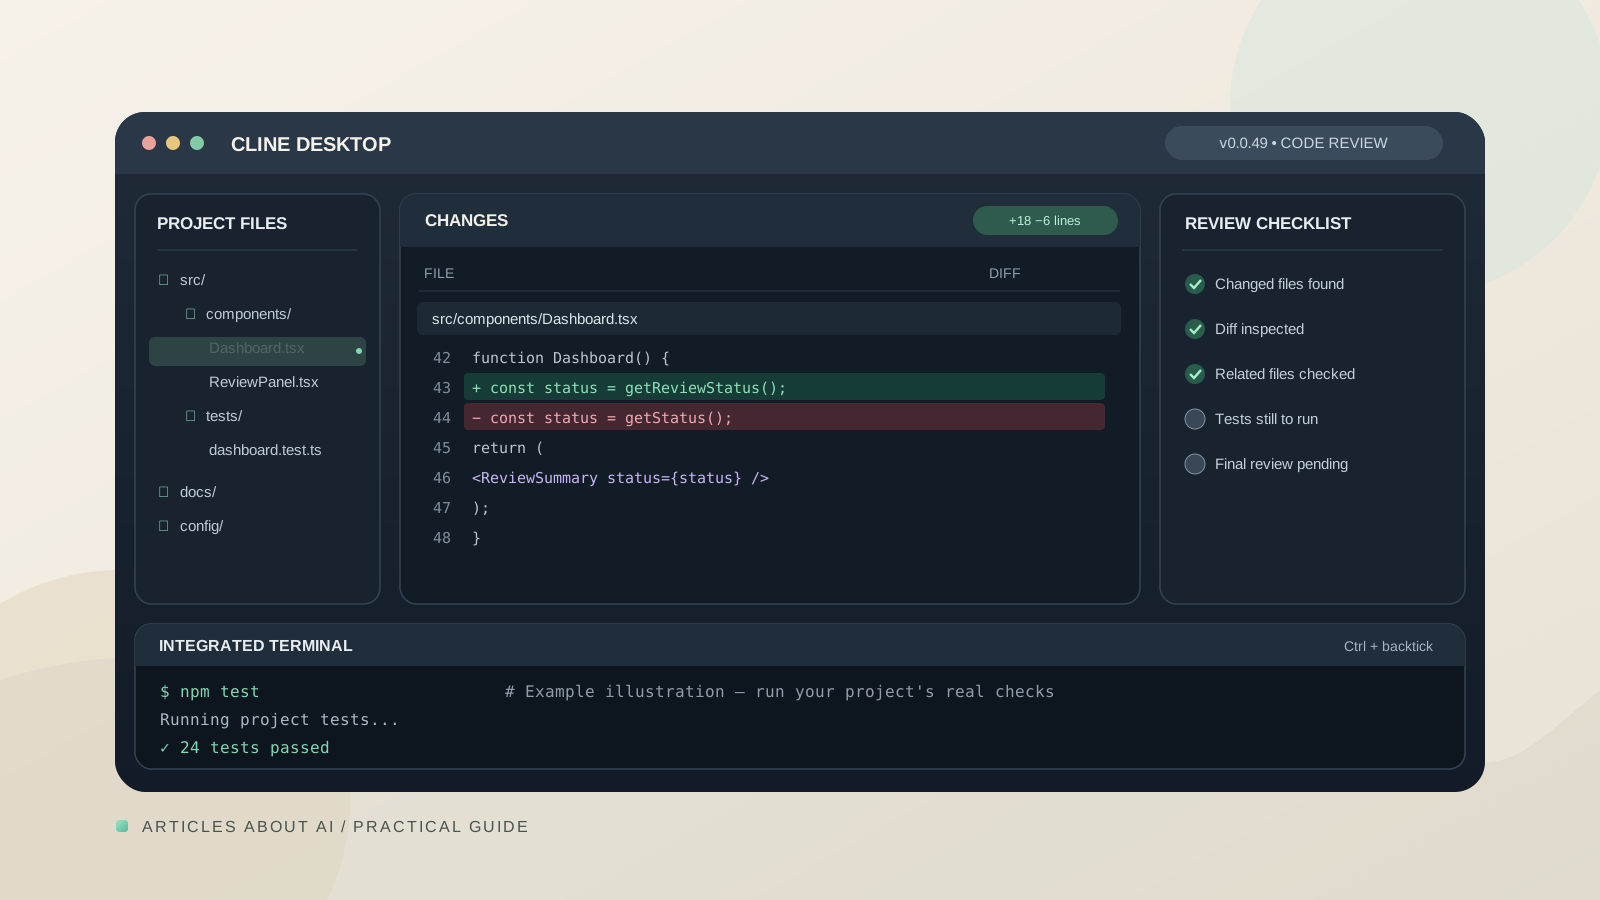
Cline Desktop 0.0.49 adds several features that make it easier to inspect work produced by an AI coding agent without constantly switching between windows. The release introduces a Changes pane with file-by-file diffs, a Project Files panel with Git status indicators, and an integrated terminal. It also adds a Local Models settings page for Ollama and LM Studio. These are practical improvements for anyone who wants to review an agent’s edits before accepting them or continuing to another task.
This guide explains what the release notes confirm, how to use the new review surfaces, and how to build a cautious verification workflow. The steps are based on Cline’s official release notes and installation documentation; the exact layout can vary by operating system and future releases. This article does not claim that the interface was independently tested.
What is new in Cline Desktop 0.0.49?
Cline published Desktop v0.0.49 on October 26, 2026. The official release notes list these relevant changes:
- Changes pane: A button in the session header shows line-change counts and opens a list of files changed in the most recent turn or throughout the session, with a diff for each file.
- Per-turn summaries: When a turn finishes, a summary below it lists the files changed. Selecting that summary opens the Changes pane focused on that turn.
- Project Files panel: A folder button opens a project file tree beside the conversation. The panel includes a read-only tabbed viewer, Git status letters, markers for files changed by the session, and a File/Diff toggle for files the agent edited.
- Integrated terminal: A terminal panel opens at the bottom of the application. The release notes specify
Ctrl + backtickas its toggle shortcut. - Local Models settings: A new settings page helps manage Ollama and LM Studio models, including setup guidance and model details. A composer indicator shows the memory used by the loaded model.
- Other workflow changes: Configurable keybindings, improved pull-request status access, and several reliability fixes are also included.
The release notes say the Project Files panel works in local and SSH environments. They describe the file viewer as read-only, so do not confuse inspecting a file in Cline with editing it directly inside that viewer.
Official source: Cline Desktop v0.0.49 release notes.
Before you start
First, make sure you are using Cline Desktop, not assuming that the same controls exist in the VS Code extension or CLI. Cline distributes its desktop application separately from its IDE extension and command-line tools.
- Open the official Cline Desktop download page or Cline’s installation guide.
- Install or update the desktop app using the official distribution for your platform.
- Open a project or workspace you are allowed to inspect. If you use a work repository, follow your organization’s access and code-review policies.
- Start or resume a Cline session. The Changes pane is most useful when the session has actually modified files.
- Keep a clean Git baseline where possible. Commit or otherwise preserve your own work before asking an agent to make broad changes, so it is easier to distinguish your edits from the agent’s edits.
Cline Desktop is available for macOS and Windows, with Windows identified as beta in the installation documentation. Availability and installation details may change, so consult the current official instructions instead of relying on an old installer link.
Step 1: Open the Changes pane
After Cline has made a code change, look in the session header for the Changes button.
According to the release notes, the button shows line-change counts and opens a pane listing the files changed by the latest turn or across the complete session. Each listed file has a diff you can inspect.
Use this pane to answer three basic questions:
- Which files did the agent change?
- What lines were added, removed, or modified?
- Does the change match the task you asked Cline to perform?
Start with the file list rather than immediately accepting the overall result. A small request that unexpectedly touches configuration, dependency, or authentication files deserves closer inspection. A large change can also be legitimate, but you should understand why each affected file was necessary.
Review one turn or the entire session
Cline 0.0.49 adds a summary under a completed turn listing the files it changed. Clicking that summary opens the Changes pane focused on that turn. This is useful when a session contains several separate requests: you can inspect the changes associated with one step instead of treating the entire conversation as one undifferentiated patch.
For a final review, switch to the session-wide list as well. A per-turn review may miss interactions between changes made in different turns. Check the whole session before you conclude that the project is ready for testing or a commit.
Step 2: Inspect files in Project Files
Select the folder button in the session header to open the Project Files panel. The release notes describe a file tree beside the conversation, a read-only tabbed file viewer, Git status letters, and markers for files changed by the current session.
Use the panel to navigate the project and understand where the agent’s changes sit in the wider codebase. For example, if the agent changes a component, inspect nearby tests, configuration, or related modules to see whether the change is consistent with the project’s structure.
For files edited by Cline, use the File/Diff toggle where available:
- File helps you read the file’s current contents.
- Diff helps you compare the changed version with its prior state.
The viewer is documented as read-only. If you need to edit a file, use the appropriate editor or workflow rather than assuming the Project Files viewer supports direct edits.
Understand Git status indicators carefully
The panel displays Git status letters. These are useful signals, but they are not a substitute for understanding your repository state. A file can have changes from your own work, an agent session, or earlier operations. Before discarding, staging, or committing anything, confirm which changes you own and which belong to the task.
Do not treat a marker that a session changed a file as proof that the change is correct. It only helps you locate the affected file.
Step 3: Use the integrated terminal for verification
Cline Desktop 0.0.49 adds an integrated terminal panel at the bottom of the application. The release notes document Ctrl + backtick as the toggle shortcut. Depending on your keyboard layout or operating system, the physical key may be labelled differently; if the shortcut does not work, consult the current application settings and release notes.
Once the terminal is open, use your project’s normal checks to verify the agent’s work. Examples include:
- Running the project’s existing test command.
- Running the linter or formatter configured by the repository.
- Building the application or checking types when the project supports those steps.
- Starting the application and manually checking the affected behavior.
- Inspecting the final Git diff before staging or committing.
Do not copy a command blindly from an AI response. Read it first, understand whether it changes files or accesses external services, and run only commands appropriate for the project. Be especially careful with destructive shell operations, deployment commands, database migrations, and scripts that access credentials.
A successful command is evidence about the check it actually ran—not proof that every part of the application is correct. If a test suite covers only a small portion of the code, state that limitation when you report the result.
Step 4: Follow a repeatable AI code-review workflow
The new panels are most useful when they become part of a consistent review process.
- Define the task. Ask Cline for a narrow, testable change. Include expected behavior and relevant constraints.
- Inspect the changed-file list. Open Changes and check whether the scope matches the request.
- Read the diffs. Look for unintended behavior, missing error handling, unsafe defaults, leaked secrets, unrelated formatting changes, and changes to dependencies or configuration.
- Check the surrounding project. Use Project Files to inspect related code and tests.
- Run relevant checks. Use the integrated terminal for the repository’s test, lint, type-check, or build commands.
- Test the actual behavior. A passing test command does not replace a manual check when the change affects a user-facing workflow.
- Review the complete session diff. Make sure no earlier turn left an unexamined change behind.
- Decide what to keep. Only then stage, commit, or ask the agent for a follow-up fix.
If you discover a problem, give Cline a concrete finding and ask for a focused correction. For example: “The new validation handles an empty string, but the test suite does not cover whitespace-only input. Add a regression test and update the implementation if needed.” After the agent responds, inspect the new diff rather than assuming the correction is complete.
For broader context on agentic development, see our comparison of Claude Code, Codex, and Gemini CLI and our guide to reusable Codex skills and plugins for repeatable AI workflows. If your workflow uses GitHub’s own coding agent, our guides to Copilot agentic autofix for code-scanning alerts and the GitHub AI secret-detection model cover related review and security topics.
Step 5: Manage local models separately
The release adds a Local Models settings page for managing models through Ollama and LM Studio. Cline’s notes mention setup guidance, model details and storage, plus a composer chip that indicates how much memory the loaded model uses.
This is a management surface, not a guarantee that every model will run well on every computer. Local inference depends on the model, the runtime, available memory, hardware, and the configuration you choose. Check the model’s requirements and the official Cline installation documentation before assuming that a model will fit your system.
If you are configuring a local model for the first time, verify that it loads and can complete a small, low-risk task before using it on a critical repository. Do not assume a model’s memory indicator predicts code quality or proves that a task is correct.
Troubleshooting common review problems
The Changes button is missing
Confirm that you are running Cline Desktop and that the installed version is 0.0.49 or later. The release notes describe the button in the session header. If the interface differs, check the app’s current version and official release notes.
The diff is not what you expected
Check whether you are viewing the latest turn or the full session. Then inspect Git status and the project’s current state. Changes may include your own edits or work from earlier turns, so preserve anything you need before reverting files.
The integrated terminal shortcut does not work
The documented shortcut is Ctrl + backtick. Keyboard layouts can differ, and operating-system shortcuts may interfere. Check the current keybinding settings and use the application’s available terminal control if necessary.
The file viewer will not let you edit
That is expected: the release describes the Project Files viewer as read-only. Use the appropriate editor or supported project workflow to make edits.
The agent’s code looks correct, but tests fail
Read the failure output and identify whether it relates to the change, an existing environment issue, or a missing dependency. Ask for a targeted fix, then rerun the relevant checks and review the new diff. Do not report tests as passing unless you observed a successful run.
Limitations and safe-use notes
Cline’s new review panels improve visibility into file changes, but they do not replace a developer’s judgment. Diffs can contain subtle logic errors, incomplete tests, insecure assumptions, or unrelated modifications. A clean-looking patch is not proof of correctness.
Keep these principles in mind:
- Review the diff before accepting or committing agent changes.
- Never paste API keys, tokens, or other secrets into prompts or screenshots.
- Inspect shell commands before running them, particularly if they delete files, alter infrastructure, or transmit data.
- Use tests and manual checks appropriate to the risk of the change.
- Preserve unrelated local work before reverting or resetting files.
- Follow your team’s review and release process for production code.
Frequently asked questions
What is new in Cline Desktop 0.0.49?
The release adds a Changes pane with diffs, a Project Files panel with a read-only viewer and Git status indicators, an integrated terminal, and a Local Models settings page for Ollama and LM Studio. It also includes other workflow and reliability improvements listed in the official release notes.
Can I review changes from a single Cline turn?
Yes. The release notes say a completed turn displays a summary of files changed. Selecting that summary opens the Changes pane focused on that turn. Review the session-wide changes as well before finishing.
Can I edit files directly in Project Files?
The release notes describe the tabbed file viewer as read-only. Use a suitable editor or supported workflow for edits.
What is the integrated terminal shortcut?
The release notes specify Ctrl + backtick to toggle the terminal panel. If the shortcut differs on your keyboard, check the app’s current keybindings.
Does Cline Desktop 0.0.49 make AI-generated code safe automatically?
No. The features help you inspect changes, but correctness and safety still require code review, appropriate tests, and careful handling of commands and secrets.
Sources and further reading
- Cline Desktop v0.0.49 release notes — primary source for the new interface features and fixes.
- Cline Desktop download page — official distribution page.
- Cline installation guide — official overview of Desktop, IDE extension, CLI, and other installation paths.
- Claude Code vs. Codex vs. Gemini CLI — related coding-agent comparison.
- Create reusable Codex skills and plugins — related guide to repeatable coding-agent workflows.
Editorial note: Feature descriptions in this article were checked against Cline’s published release notes and installation documentation. The interface was not independently tested for this article; verify the current version and on-screen labels before following version-specific steps.